
Thomas Kussé
GDPR, General Data Protection Regulation (AVG,) cookie compliance,... you can't ignore it these days. Your mailbox is full of them, everywhere you have to accept new privacy statements and your favourite websites suddenly have a banner in which they ask your permission for all kinds of cookies. There are high fines for breaking the law, which is why most companies have taken action. Now it's your turn ;).
In this blog we explain how to make your website comply with GDPR and cookie legislation using Google Tag Manager (GTM). No knowledge of GDPR yet? Then take a look at our other blog articles: Be ready for the new GDPR legislation and GDPR for marketers in 6 steps.
Cookies are small files that are placed on your device when you visit a website. These cookies have necessary functions such as keeping track of your language preference or less necessary functions such as personalising marketing messages. (Read our cookie statement)
For non-essential cookies, implicit consent is not sufficient. Visitors must give unambiguous consent for optional cookies. Pop-up banners such as "by using this website you consent to cookies" are therefore no longer sufficient.
For optional cookies you should therefore ask permission and visitors should also be able to refuse them. By default, the highest privacy setting should apply ("privacy by default"). Tracking scripts that use personal data such as a name, IP address, ... should therefore only take effect after the cookie has been accepted. Moreover, visitors must have a way of deleting these cookies again once they have changed their mind.
Now you must be thinking, this is going to cost me a lot of money in development. But there is a way you can manage cookies fairly easily. Via Google tag manager (GTM) and... a cookie. Before you can get started with GTM, you need to have a cookie banner on your website, asking visitors for permission for optional cookies and giving them the option to refuse. Ask the developers of your website, and make sure the permission is kept in a cookie, that way we make the connection with tag manager.
The cookie banner on Calibrate.be gives you the choice to accept or reject optional cookies. There is also a link to more information.
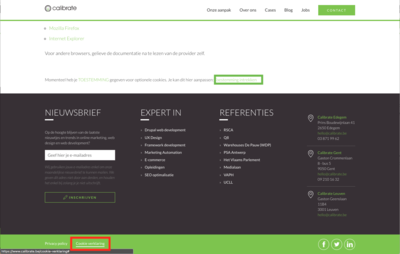
The cookie statement can be accessed from any page via the footer. At the bottom of this page the permission can be changed with a simple click.
Do you have a cookie banner in accordance with the above rules? Then you can start using GTM to manage all your tracking scripts/pixels in one place. How to set this up can be found here in the step-by-step plan.
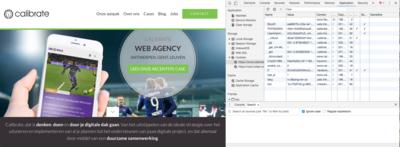
In Google chrome you can see which cookies are on your device by right-clicking > inspect > application > cookies. Here you can see the name of the cookies, what value they have and where they come from (e.g. facebook.com). Please note that these are certainly not all cookies, but the cookies on your device. Certain cookies can only be placed on a specific page or installed after a certain action. Embedded content such as Youtube videos also often use cookies. So always ask your developers which cookies are on the website and if they can provide you with a list.
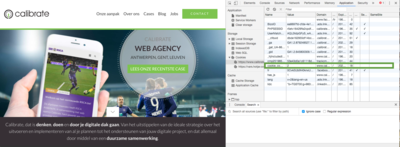
Identify the cookie that tracks privacy preferences and its value. On Calibrate.be this cookie is called "cookie_compliance" and has a value of "2" when accepting optional cookies. Don't know which cookie it is? Accept the cookie banner again and check which cookie is added or changes value.
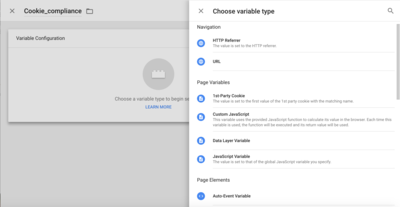
Bring the data from this cookie to Google Tag Manager in the form of a variable. Choose 1st party cookie and enter the exact name of the cookie (It is important that this is exactly the same name, otherwise GTM will not recognise the cookie
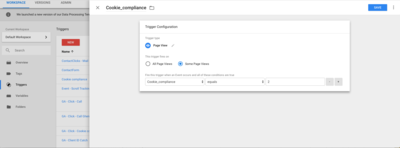
Create a trigger that states that a tag should not fire until the cookie has been accepted. To do this, look at the value the cookie has when it is fired and the value it has when optional cookies are not accepted.
On calibrate.be this cookie has a value of "1" if no consent was given (or it was revoked) and a value of "2" if consent was given.
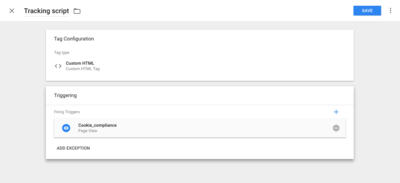
Give all tags that trace personal data the trigger of the cookie_compliance (fire only if cookie_compliance = "2"). This ensures that tags tracking personal data only fire when the cookie is accepted.
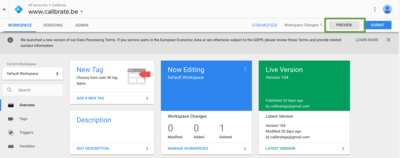
As is always the case with GTM, it is best to test whether everything is going according to plan. In the preview mode you can see which tags fire and when, and thus what changes if you accept or refuse optional cookies.
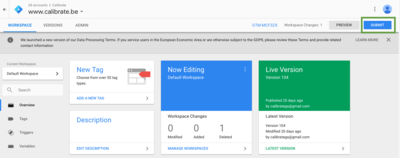
Is everything all right? Then you can submit the renewed container. Don't forget or else nothing will happen on your live website.